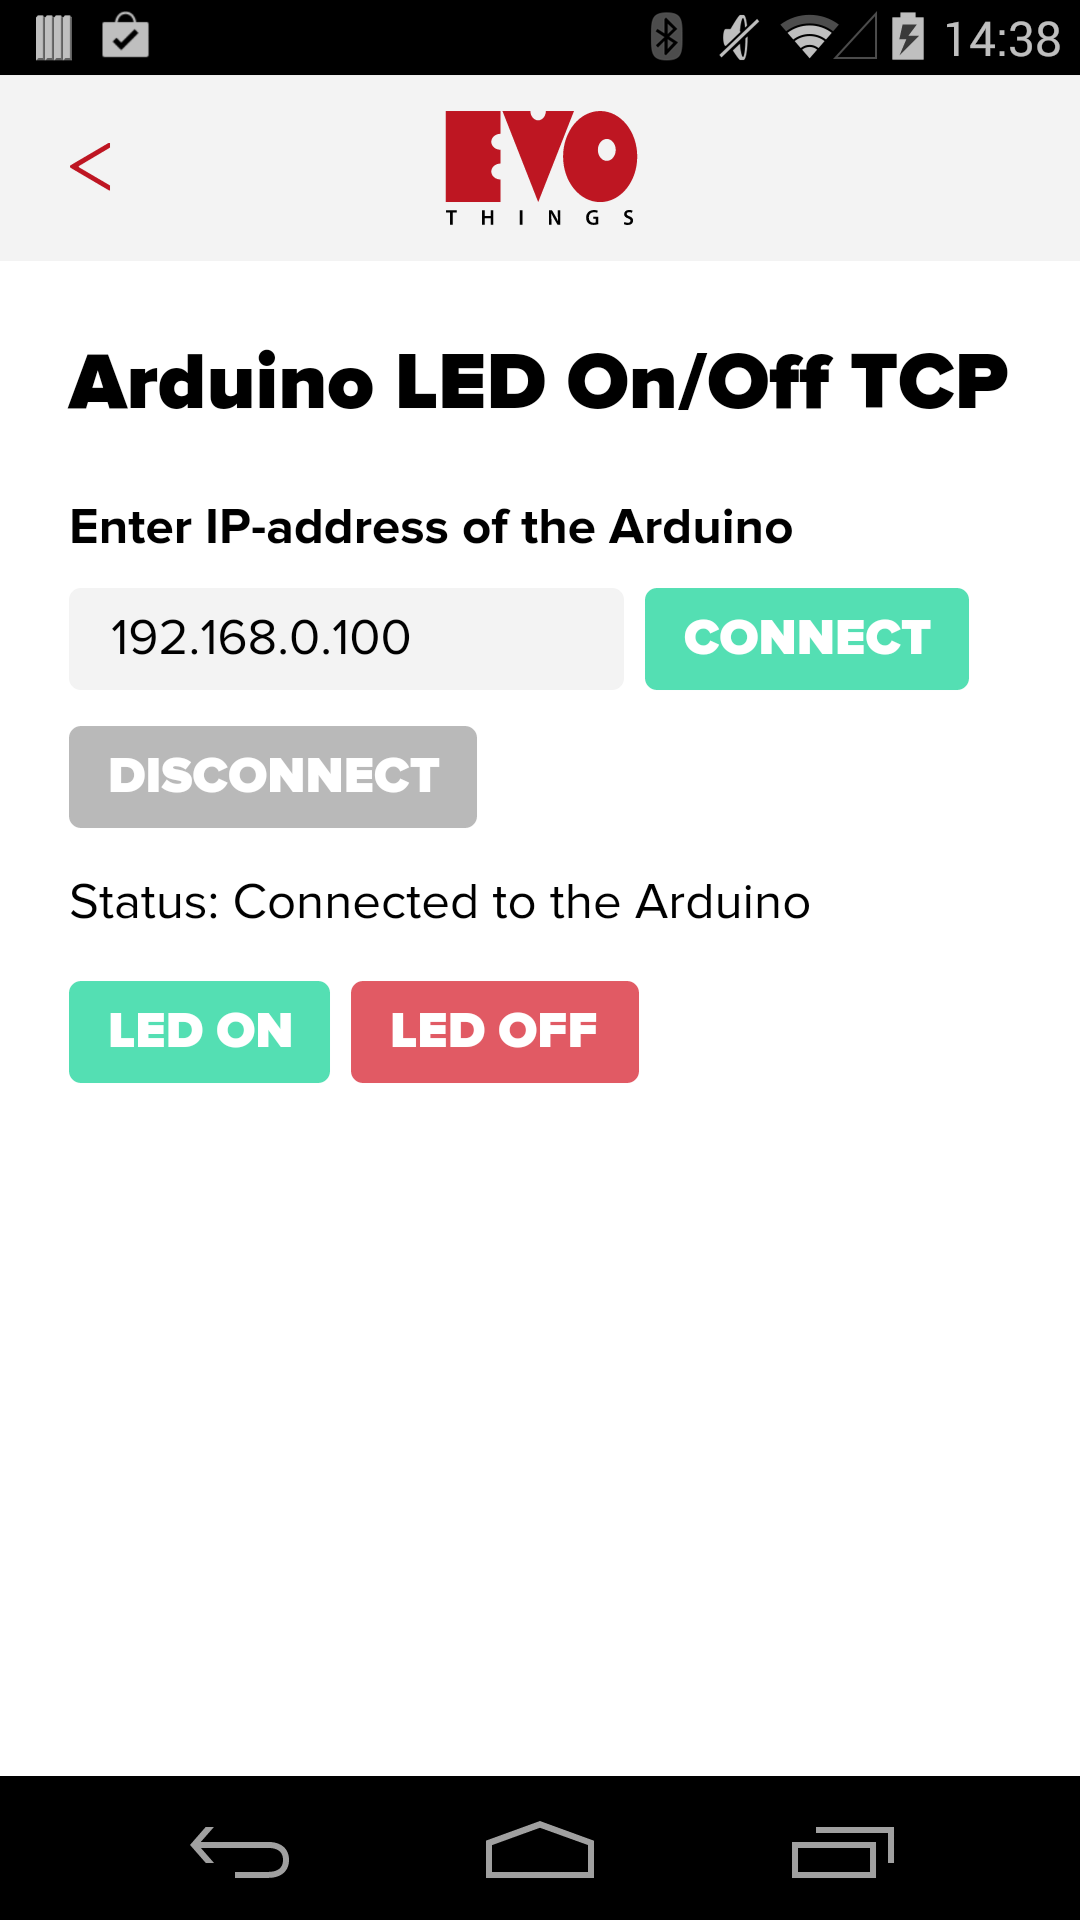
Arduino LED On/Off TCP
Control The Arduino From An App. This example shows how to make an app that controls an Arduino board, by communicating over the TCP networking protocol.
Communication with the Arduino is made using a WiFi shield or an Ethernet shield.
When using a WiFi shield, you communicate directly from your mobile device to the Arduino. Make sure you are on the same LAN for this to work.
When using am Ethernet shield, you communicate from your mobile device to a WiFi router, that in turn need to be able to connect to the IP-address of the Ethernet shield.
Source code
You can browse the source code for this example at the Evothings GitHub repository
The file index.html is the entry point of the app. File arduinotcp.js contains functions for scripting the Arduino from JavaScript. You can set pin mode and set HIGH/LOW for pins.
The file arduinowifi.ino contains the Arduino WiFi server that listens for commands from the app.
The file arduinoethernet.ino contains the Arduino Ethernet server that listens for commands from the app.
What you need
This example runs in Evothings Viewer on Android or iOS.
You need to run this example in Evothings Viewer. Alternatively, you can build a Cordova application if you wish to distribute the app. You then need to include the Cordova plugin org.chromium.socket. Read more in the documentation of the Evothings Viewer.
For the Arduino setup, you need:
- WiFi shield or Ethernet shield
- LED
- Resistor 220 Ohm
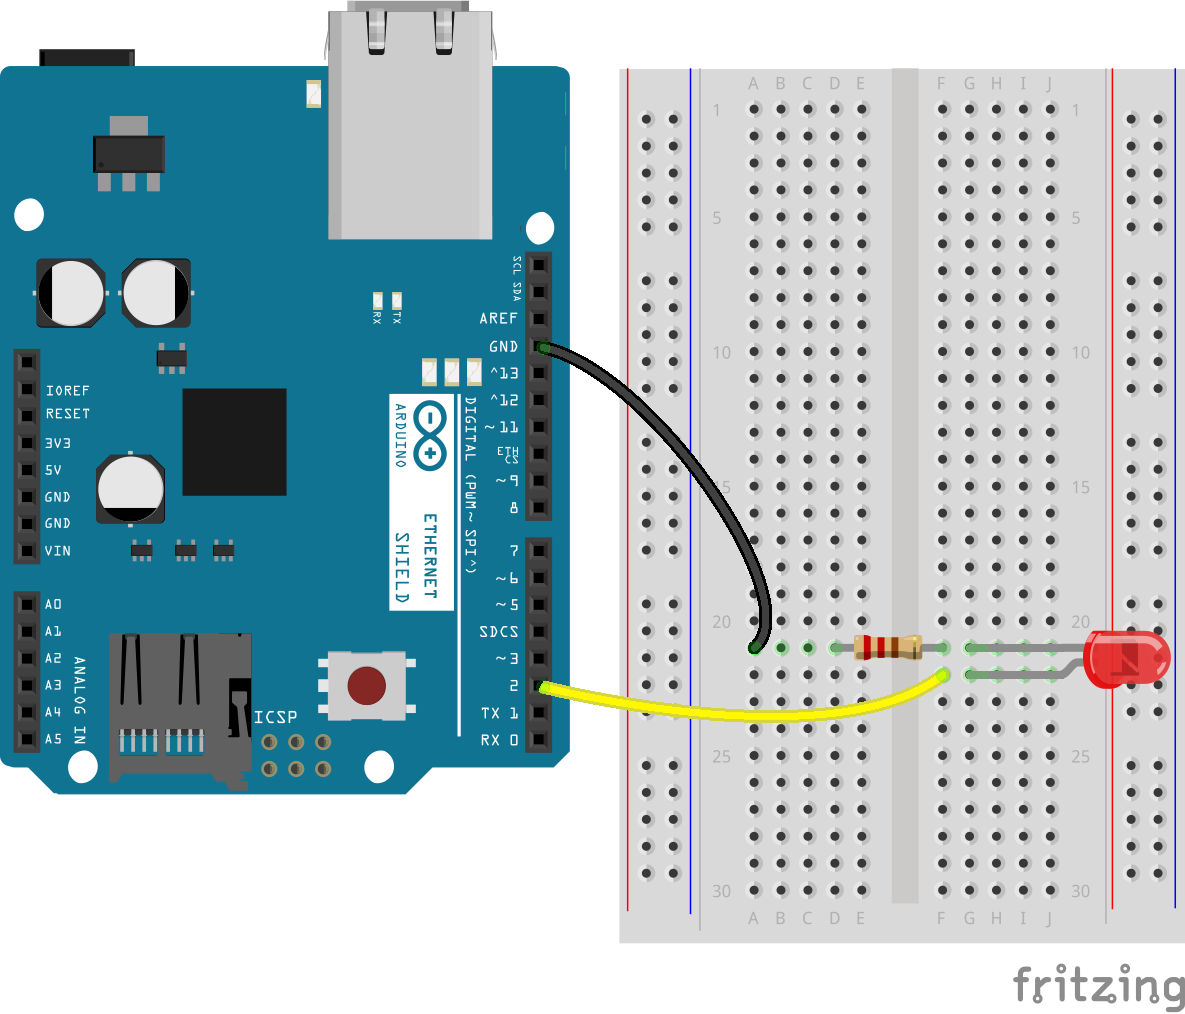
Here is a sketch using the Arduino Ethernet shield:
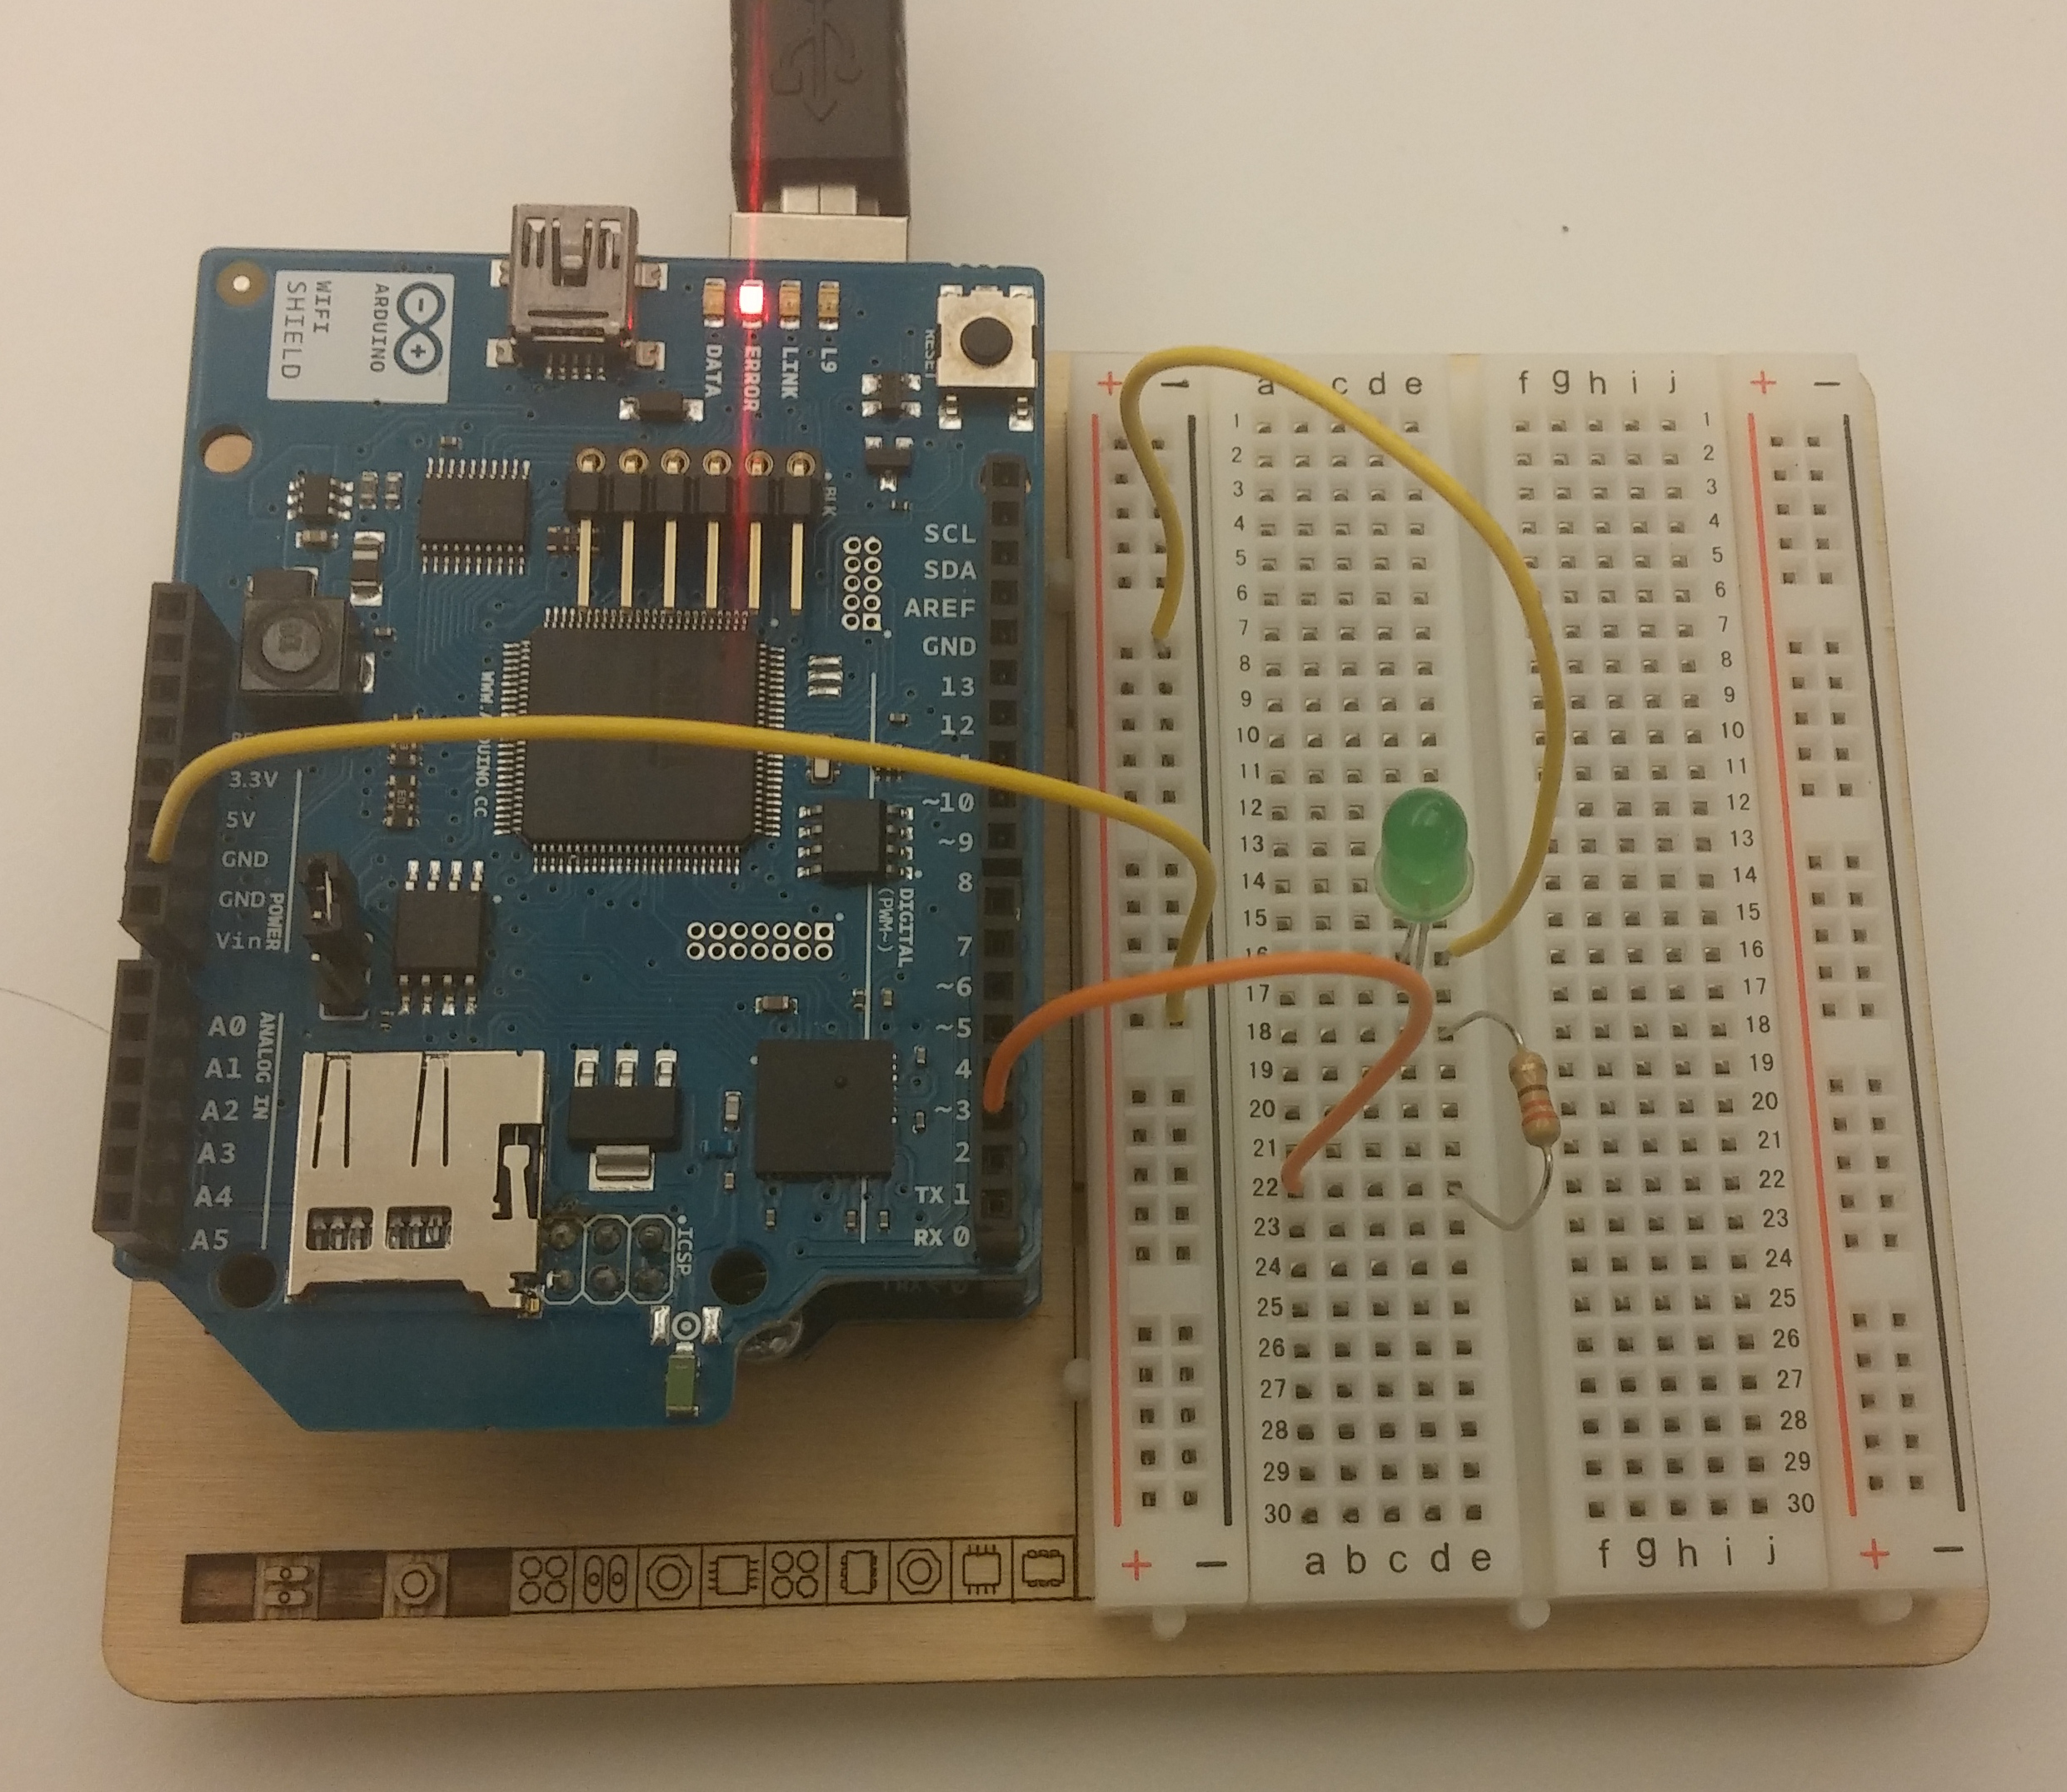
Here is a photo of a board configured to work with this example, using an Arduino WiFi shield. Note that output pin 2 is used (it may look like pin 3 in the photo).
How to get up and running
Follow these steps to get started with this example:
- Wire up the Arduino board.
- Open arduinowifi.ino or arduinoethernet.ino in the Arduino development tool.
- Enter the name and password for your WiFi network in arduinowifi.ino or configure your IP-address in arduinoethernet.ino.
- Upload the program to the Arduino.
- If using a WiFi shield, open the Serial Monitor Window and look for the IP address of the Arduino. (If the IP address is not displayed, check your WiFi network name and password.)
- Run Evothings Workbench on your desktop/laptop computer.
- Run Evothings Viewer on an iOS or Android mobile device and connect to the Workbench.
- Launch the example "Arduino LED On/Off TCP" from the Workbench window.
- Enter the IP address of the Arduino in the app.
- If everything works, you should now be able to turn the LED on and off using the buttons in the app. If it does not work, check your wiring and that the right pins are used (remember pin 2 is used for output).
- Now you can proceed with making your own sketch designs and add more buttons to the app.